

A plumbing leak is unwanted water escape from a supply pipe, fixture, appliance connection, or drain joint. Start with proof, use the water meter or pressure gauge, then narrow the source by isolating fixtures. Next, confirm the type, supply-side leaks raise meter use, drain leaks show staining and odor without steady meter movement. Detection ranges from simple dye tests to thermal and acoustic tools. Repairs range from washer and fill valve swaps to pipe joint rebuilds and full line replacement. U.S. EPA WaterSense reports that average household leaks waste about 10,000 gallons per year, and about 10% of homes waste 90 gallons per day or more, so a “small drip” often acts like a part-time faucet. EPA
How To Identify A Plumbing Leak?
Identify a plui, then linking the water loss to one fixture, one zone, or one pipe run.
Do this in 6 checks old tools, proven order:
Check the water meter. Turn off all fixtures and appliances that use water. Watch the meter leak indicator for 5 to 10 minutes. Movement signals a supply-side leak.
Check toilets first. Toilets often lose water silently. Add dye to the tank and wait 10 to 15 minutes. Dye in the bowl signals a flapper or flush valve leak.
Check under sinks and around shutoff valves. Touch joints with a dry paper towel. A towel finds what eyes miss.
Check water pressure. Excess pressure raises failure risk. Many U.S. codes limit static pressure to 80 psi. ICC Digital Codes
Separate hot vs cold. Run only cold for 2 minutes, then only hot. Leaks that change with hot use often link to water heater piping, hot branches, or recirc loops.
Check drains by staining. Brown rings under a trap, cabinet base swelling, or ceiling staining after fixture use points to a drain-side leak.
Meter movement with no use points to a pressurized supply leak, staining after use points to a drain or overflow leak, and toilet dye removes guesswork fast.
| Quick check | What you do | What it usually means |
|---|---|---|
| Meter moves with all fixtures off | Watch 5 to 10 minutes | Pressurized supply leak pipe, valve, appliance feed |
| Dye shows in toilet bowl | Add dye, wait 10 to 15 minutes | Worn flapper, flush valve seal, or overflow tube issue |
| Wet towel at compression nut | Wipe valve, angle stop, braided line | Loose nut, worn ferrule, failing supply line |
| Stain appears after shower use | Inspect below bathroom | Drain trap, overflow gasket, grout failure, or supply to valve |
| Pressure above 80 psi | Gauge at hose bib | Need pressure control to reduce failure risk ICC Digital Codes |
How To Find Hidden Leaks?
Find hidden leaks by measuring moisture and pressure where water is not supposed to exist, then confirming the path with targeted access.
Hidden leak locations that show up most:
Behind tub and shower valves
Under slab supply lines
Inside wall cavities near exterior hose bibs
Under dishwashers, ice makers, washing machines
In ceilings below bathrooms
Practical methods that do not guess:
Moisture meter scan. Trace the wettest line to the source edge.
Thermal scan. Cold-water leaks often show a cool pattern; hot leaks show warm patterns.
Acoustic check. A steady hiss behind a wall with all fixtures off signals pressurized flow.
Isolation test. Shut off one branch valve at a time, then re-check the meter. No branch valve means a fixture-by-fixture shutoff test.
What Are The Methods And Tools To Detect Plumbing Leaks?
Plumbing leak detection uses 6 main methods: visual confirmation, meter tracking, pressure testing, dye testing, acoustic location, and imaging.
Methods and common tools:
Visual: flashlight, mirror, paper towel, cabinet liner removal
Meter tracking: water meter leak dial, smart meter history if present
Pressure testing: pressure gauge, test plugs for DWV tests
Dye testing: toilet dye tablets or food dye
Acoustic: listening device, ground mic, electronic amplifier
Imaging: thermal camera, borescope, moisture meter
Before the table, use this rule: pick the method that matches the system type. Supply piping responds to meter and pressure tests. Drains respond to dye, camera, or localized water application.
| Method | Best for | Tool examples | Limitation |
|---|---|---|---|
| Water meter movement | Supply-side loss | Meter leak dial | Misses drain-only leaks |
| Static pressure drop | Supply lines | Pressure gauge | Needs isolation, slow leaks take time |
| Dye test | Toilets, overflows | Dye tablet | Only proves path, not pipe route |
| Acoustic location | Pressurized pipe leaks | Listening device | Noise from HVAC or traffic masks sound |
| Thermal imaging | Hot and cold supply leaks | Thermal camera | Needs temperature contrast |
| Camera inspection | Drain and sewer lines | Inspection camera | Needs cleanout access |
What Are The Signs Of Plumbing Leaks?
Signs of plumbing leaks include unexplained meter movement, higher water bills, damp building materials, odor from moisture damage, and fixture behavior changes.
High-signal signs fast to verify:
Water bill jump with no habit change. EPA notes household leaks waste about 10,000 gallons per year on average. EPA
Running toilet sound after the fill stops.
Soft drywall, peeling paint, bubbling finishes, warped baseboards.
Moldy smell near cabinets or walls.
Lower pressure at multiple fixtures.
Water heater relief discharge or frequent burner cycling linked to unseen hot-side loss.
What Are The Common Causes Of Plumbing Leaks?
Common causes of plumbing leaks are worn seals, loose joints, corrosion, high water pressure, freeze damage, and mechanical stress on pipes.
Common causes, with the “why it fails” detail:
Worn elastomers: flappers, O-rings, cartridges shrink and crack with age and chlorine exposure.
Loose compression joints: vibration and temperature change relax nuts over time.
Corrosion and pitting: aggressive water chemistry and dissimilar-metal joints accelerate pinholes.
High static pressure: many codes cap static pressure at 80 psi, higher pressure raises stress on fixtures and hoses. ICC Digital Codes
Freeze expansion: trapped water expands and splits copper, CPVC, PEX fittings, or valves.
Unsupported piping: poor strapping lets pipes rub, then wear through.
What Are The Types Of Plumbing Leaks?
Types of plumbing leaks group into supply leaks, fixture leaks, appliance leaks, drain and sewer leaks, irrigation leaks, and slab leaks.
Before the table, this classification matters because the test differs. Supply leaks show on the meter. Drain leaks show after use. Slab leaks often show as warm spots, cracks, or constant meter movement.
| Leak type | Typical clue | Common origin point | First fix step |
|---|---|---|---|
| Supply pipe leak | Meter moves at rest | Pinholes, failed joint | Shut main, isolate branch |
| Faucet or shower leak | Drip, staining | Cartridge, washer, seat | Replace cartridge or washer |
| Toilet leak | Silent refills | Flapper, fill valve | Dye test, replace worn parts |
| Appliance feed leak | Wet floor near unit | Hose, compression nut | Replace hose, verify torque |
| Drain trap leak | Cabinet base damage | Slip joint nut, gasket | Re-seat gasket, replace trap |
| DWV joint leak | Ceiling stain after use | Loose hub, cracked pipe | Repair joint, support pipe |
| Sewer line leak | Odor, wet yard | Root intrusion, crack | Camera inspection, repair section |
| Slab leak | Warm spot, constant loss | Copper under slab | Isolation test, pro locate |
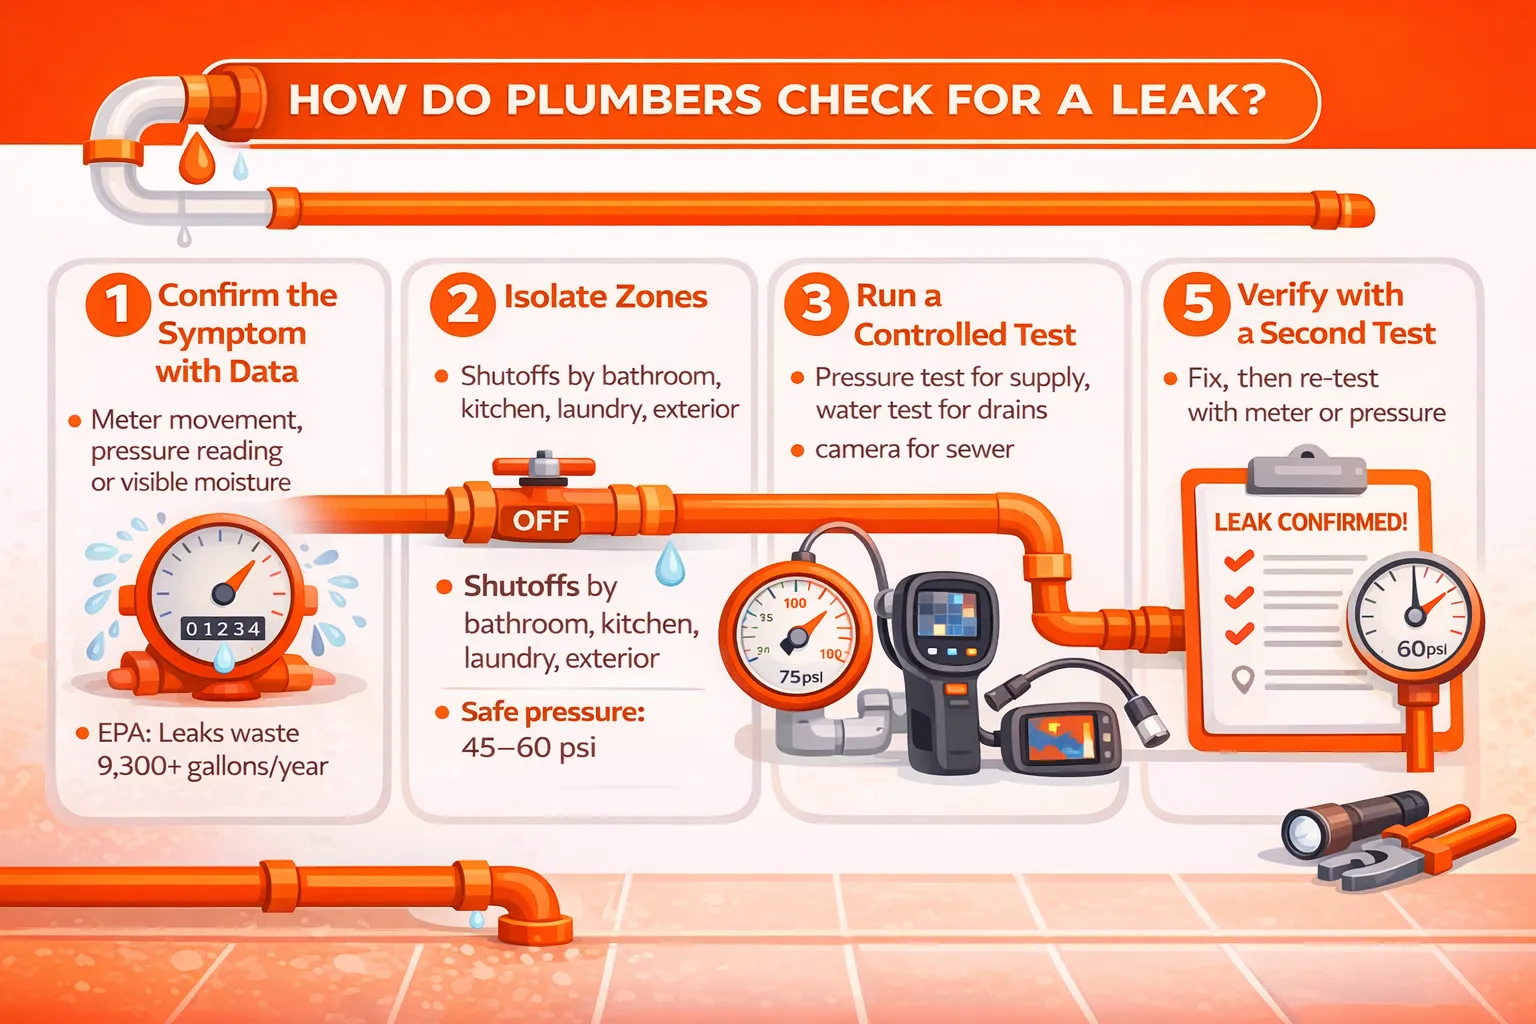
How Do Plumbers Check For A Leak?
Plumbers check for a leak by isolating the system into zones, testing each zone under controlled conditions, then locating the exact point with instruments.
A typical professional sequence:
Confirm the symptom with data. Meter movement, pressure reading, or visible moisture.
Isolate zones. Shutoffs by bathroom, kitchen, laundry, exterior.
Run a controlled test. Pressure test for supply, localized water test for drains, camera for sewer.
Locate precisely. Acoustic, thermal, moisture mapping, inspection camera.
Verify with a second test. Fix, then re-test with meter or pressure.
How To Fix A Plumbing Leak?
Fix a plumbing leak by stopping the water, relieving pressure, repairing the failed part with the correct fitting or seal, then re-testing the system.
Safety first steps fast, practical:
Close the nearest shutoff valve. If no local valve works, close the main.
Relieve pressure. Open a faucet at the lowest level.
Protect power. If water reached outlets or appliances, switch power off at the breaker for that circuit.
Diverse fixes by plumbing area water systems, fixtures, drainage:
Fix a dripping faucet: replace cartridge, washer, or O-rings; clean the seat if the model uses a replaceable seat.
Fix a running toilet: replace flapper and fill valve; set water level about 1 inch below the overflow tube lip.
Fix a leaking supply line: replace braided hose, do not reuse crushed ferrules; hand-tighten, then a small wrench turn.
Fix a sweating joint that sprays: shut main, cut out the bad section, rebuild with the correct coupling for copper, PEX, CPVC, or PVC.
Fix a P-trap drip: replace slip-joint washers, align the trap arm, avoid cross-threading.
Fix a PVC drain seep: replace cracked fitting, use correct primer and cement, then cure per product label.
Fix a water heater piping leak: replace nipple or flex connector, inspect the temperature and pressure relief discharge path, and stop if the tank body itself seeps.
Fix an outdoor hose bib leak: replace vacuum breaker or stem packing washer, then add frost protection in cold climates.
Before the table, use it as a repair selector. It links the symptom to the most common repair part, plus the “stop and call” line.
| Where the leak shows | Common failed part | Repair that usually works | Stop and call a plumber when |
|---|---|---|---|
| Under sink at shutoff | Compression seal, supply hose | Replace hose or ferrule | Valve body drips from stem and will not stop |
| Toilet keeps refilling | Flapper, fill valve | Replace both parts | Floor feels soft or flange area smells of sewer gas |
| Shower valve area damp | Cartridge, valve joint | Replace cartridge, inspect trim seal | Wetness spreads inside wall, mold, or structural damage |
| Ceiling stain after tub use | Overflow gasket, trap | Replace gasket or trap | Stain grows fast or ceiling sags |
| Constant meter movement | Hidden supply leak | Isolation test, then repair section | Loss rate high or location unknown |
How To Detect A Gas Leak?
Detect a gas leak by treating any gas odor, hissing, or suspected gas release as an emergency, then leaving the area and calling the gas utility or emergency services from a safe location.
What to do right away:
Leave the building. Get people and pets out.
Avoid sparks. Do not flip switches, use phones inside, or start vehicles near the building. Consumers Energy
Call the gas utility or emergency services from outside. Utilities publish gas emergency steps that start with evacuation and no spark sources. Consumers Energy
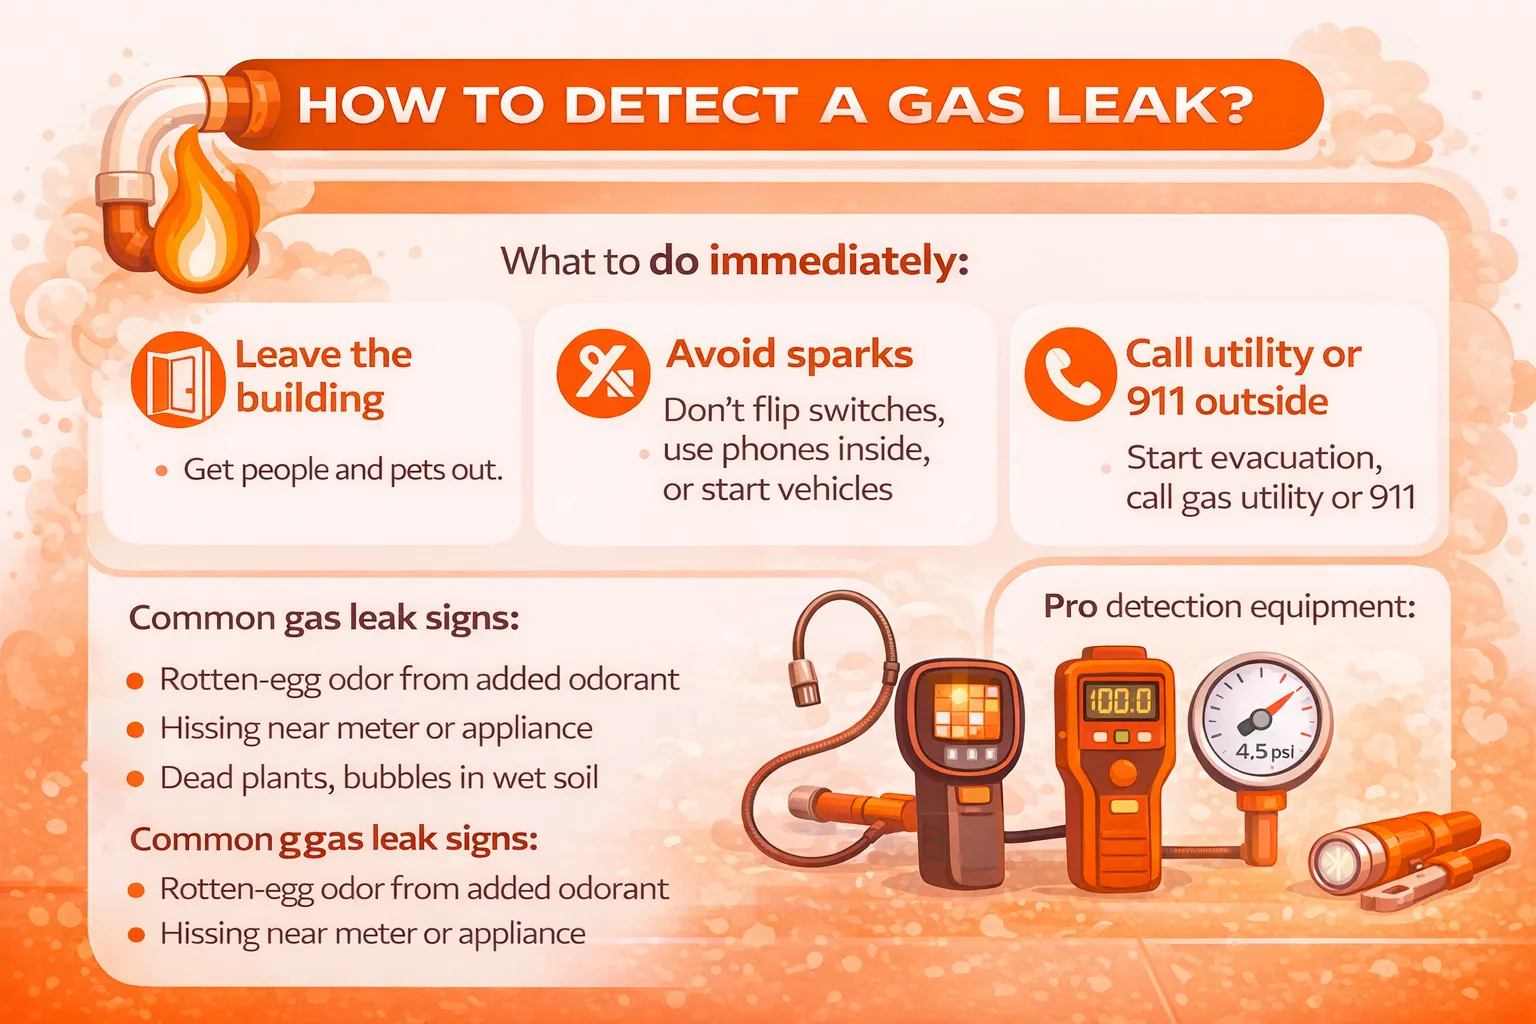
Common gas leak signs do not “hunt” for the source:
Rotten-egg odor from added odorant many utilities use odorization so people detect gas faster Utilities for My Home
Hissing near a meter or appliance connection
Dead vegetation near buried piping, bubbles in puddles near the service line area
Pilot outage patterns or appliance flame problems this can have other causes, so treat as a warning, not proof
What professionals use:
Combustible gas indicators and pressure tests performed by licensed technicians, after the area is safe. Consumers Energy
Comments (0)
Comments are disabled.